

Have you ever heard of a fulgurite? A sand fulgurite results when lighting strikes a beach. This natural phenomenon leaves behind a fragile, tube-like glass structure caused by the sand fusing from the lightning's 3,000-degree heat. These events are rare, and finding a sand fulgurite is even more rare due to its fragility.
If you want to create something out of glass, you'll need the same basic ingredients that comprise a fulgurite — heat and sand — plus a whole lot more. For starters, add soda, ash, and limestone. It really helps if you have great hand-eye coordination, an impeccable sense of timing, years of practice and a genuine love for the craft of glassblowing. Sheer talent and creativity also help — a lot.
For artisans Michelle Plucinsky and her husband, Chris Nordin, glassblowing has been a lifelong journey. Michelle and Chris are the owners and artists at Glass Academy in Dearborn, Michigan. Their 14,000-square-foot facility is both a private art studio and a classroom for those interested in glassblowing. They sell their art in the adjacent gallery.
We talked with Michelle about their business and how it started, and she also walked us step-by-step through the process of making a mug in their studio.
This interview has been edited for length and clarity.
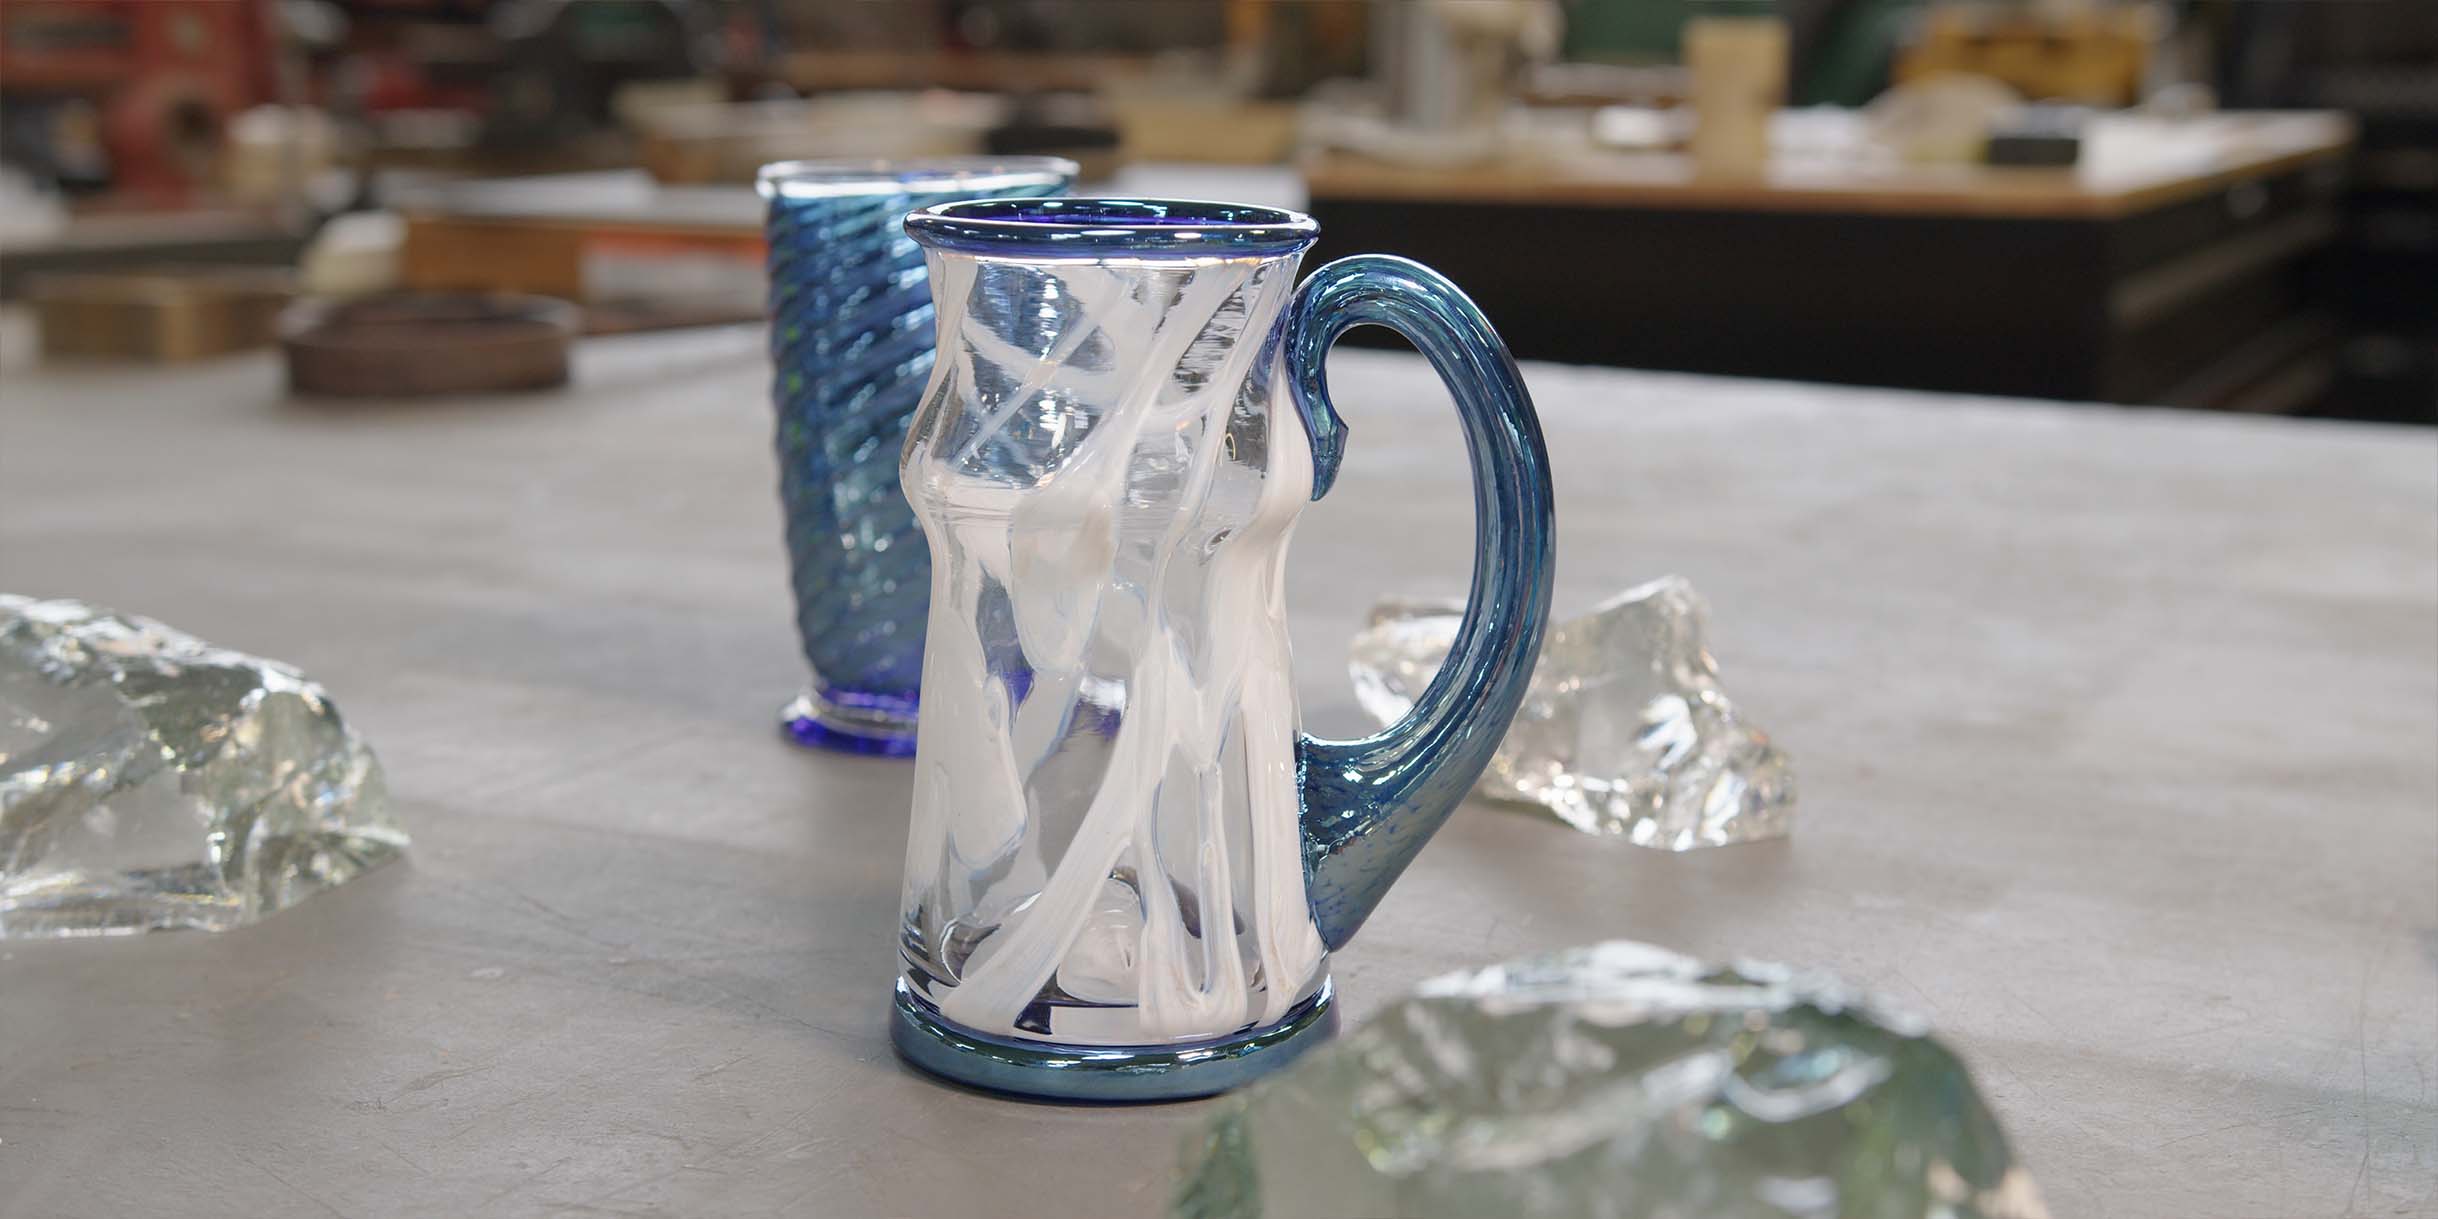
Remember when you were a kid, maybe you had one of those books where you could change the eyes and the mouth and make all these different faces? It's kind of like that for us with glass mugs. We've named each of the components of our mugs. We've got a variety of handle shapes, body shapes and foot shapes. We have a class called Happy Hour where the customer gets to play designer. They'll come into our gallery and say, "I want a blue polka-dot mug, with a pink handle, and a red foot," and we'll make that mug just for them. Aside from classes, we manufacture during the day, making the products we sell in our gallery and online. We do beer mugs, rocks glasses and wine goblets, plus other fun kitschy items like our glass slugs. We like making something affordable so everyone can own a piece.
What Are Glass Slugs? Get the whole story and more here.
The Glass
The main ingredient of glass is sand. We add soda, ash and limestone, all binding agents, which also helps lower the melting temperature. We buy our glass melted once so when we get it, it's these little glass cubes. We take these little nuggets and throw them into a ceramic pot. The melting temperature is 2,400 degrees, so it takes a few days to get the glass up to the right temperature.
The Process
It starts with a design. It's important to design things out and to have all of your tools ready so you can think about the direction you're going, and you don't waste any time. Sometimes we draw designs on the floor in chalk so the assistant knows exactly what to expect. The moment you sit down at the bench, you have to know which tool to grab for the job in the moment so you can complete each step and move on to the next. With glass, the less you touch it and the more intentional you are, the more successful you will be. A master is someone who knows exactly what steps to take from the moment the glass comes out of the furnace. A true master can make the process look easy, and a finished piece look flawless.
Making a Mug
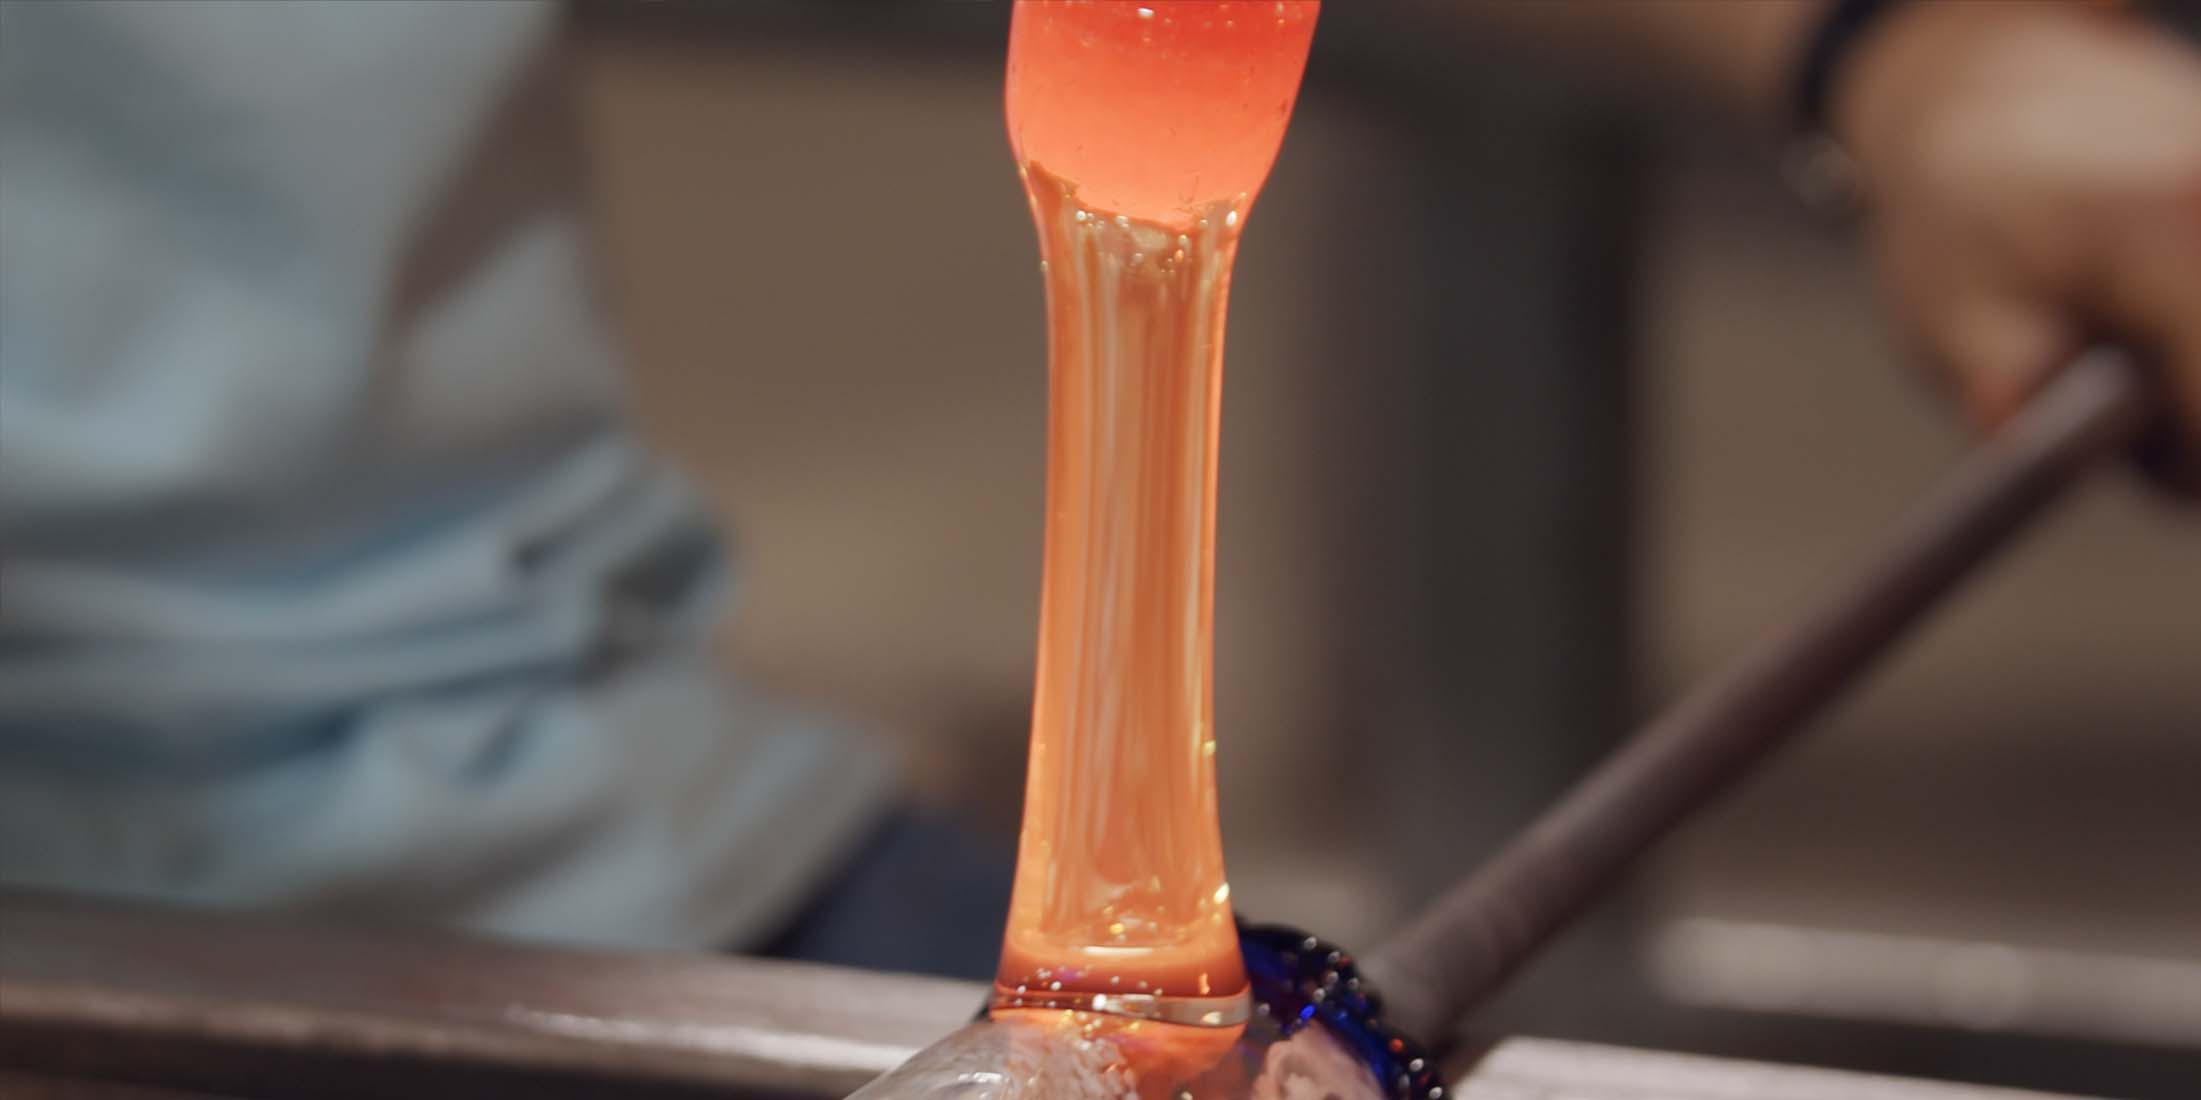
When you first take some glass from the furnace, it's still in a liquid state. We work with temperatures at around 2,100 degrees when we shape the glass. To make something hollow like a mug, you scoop out about one cup measure of glass. Then you take the blow pipe, and you scoop the glass onto it and begin the process. The end of the blow pipe is heated so the glass will stick. Once the glass is stuck on the pipe, it's time to shape it.
Shaping the Glass
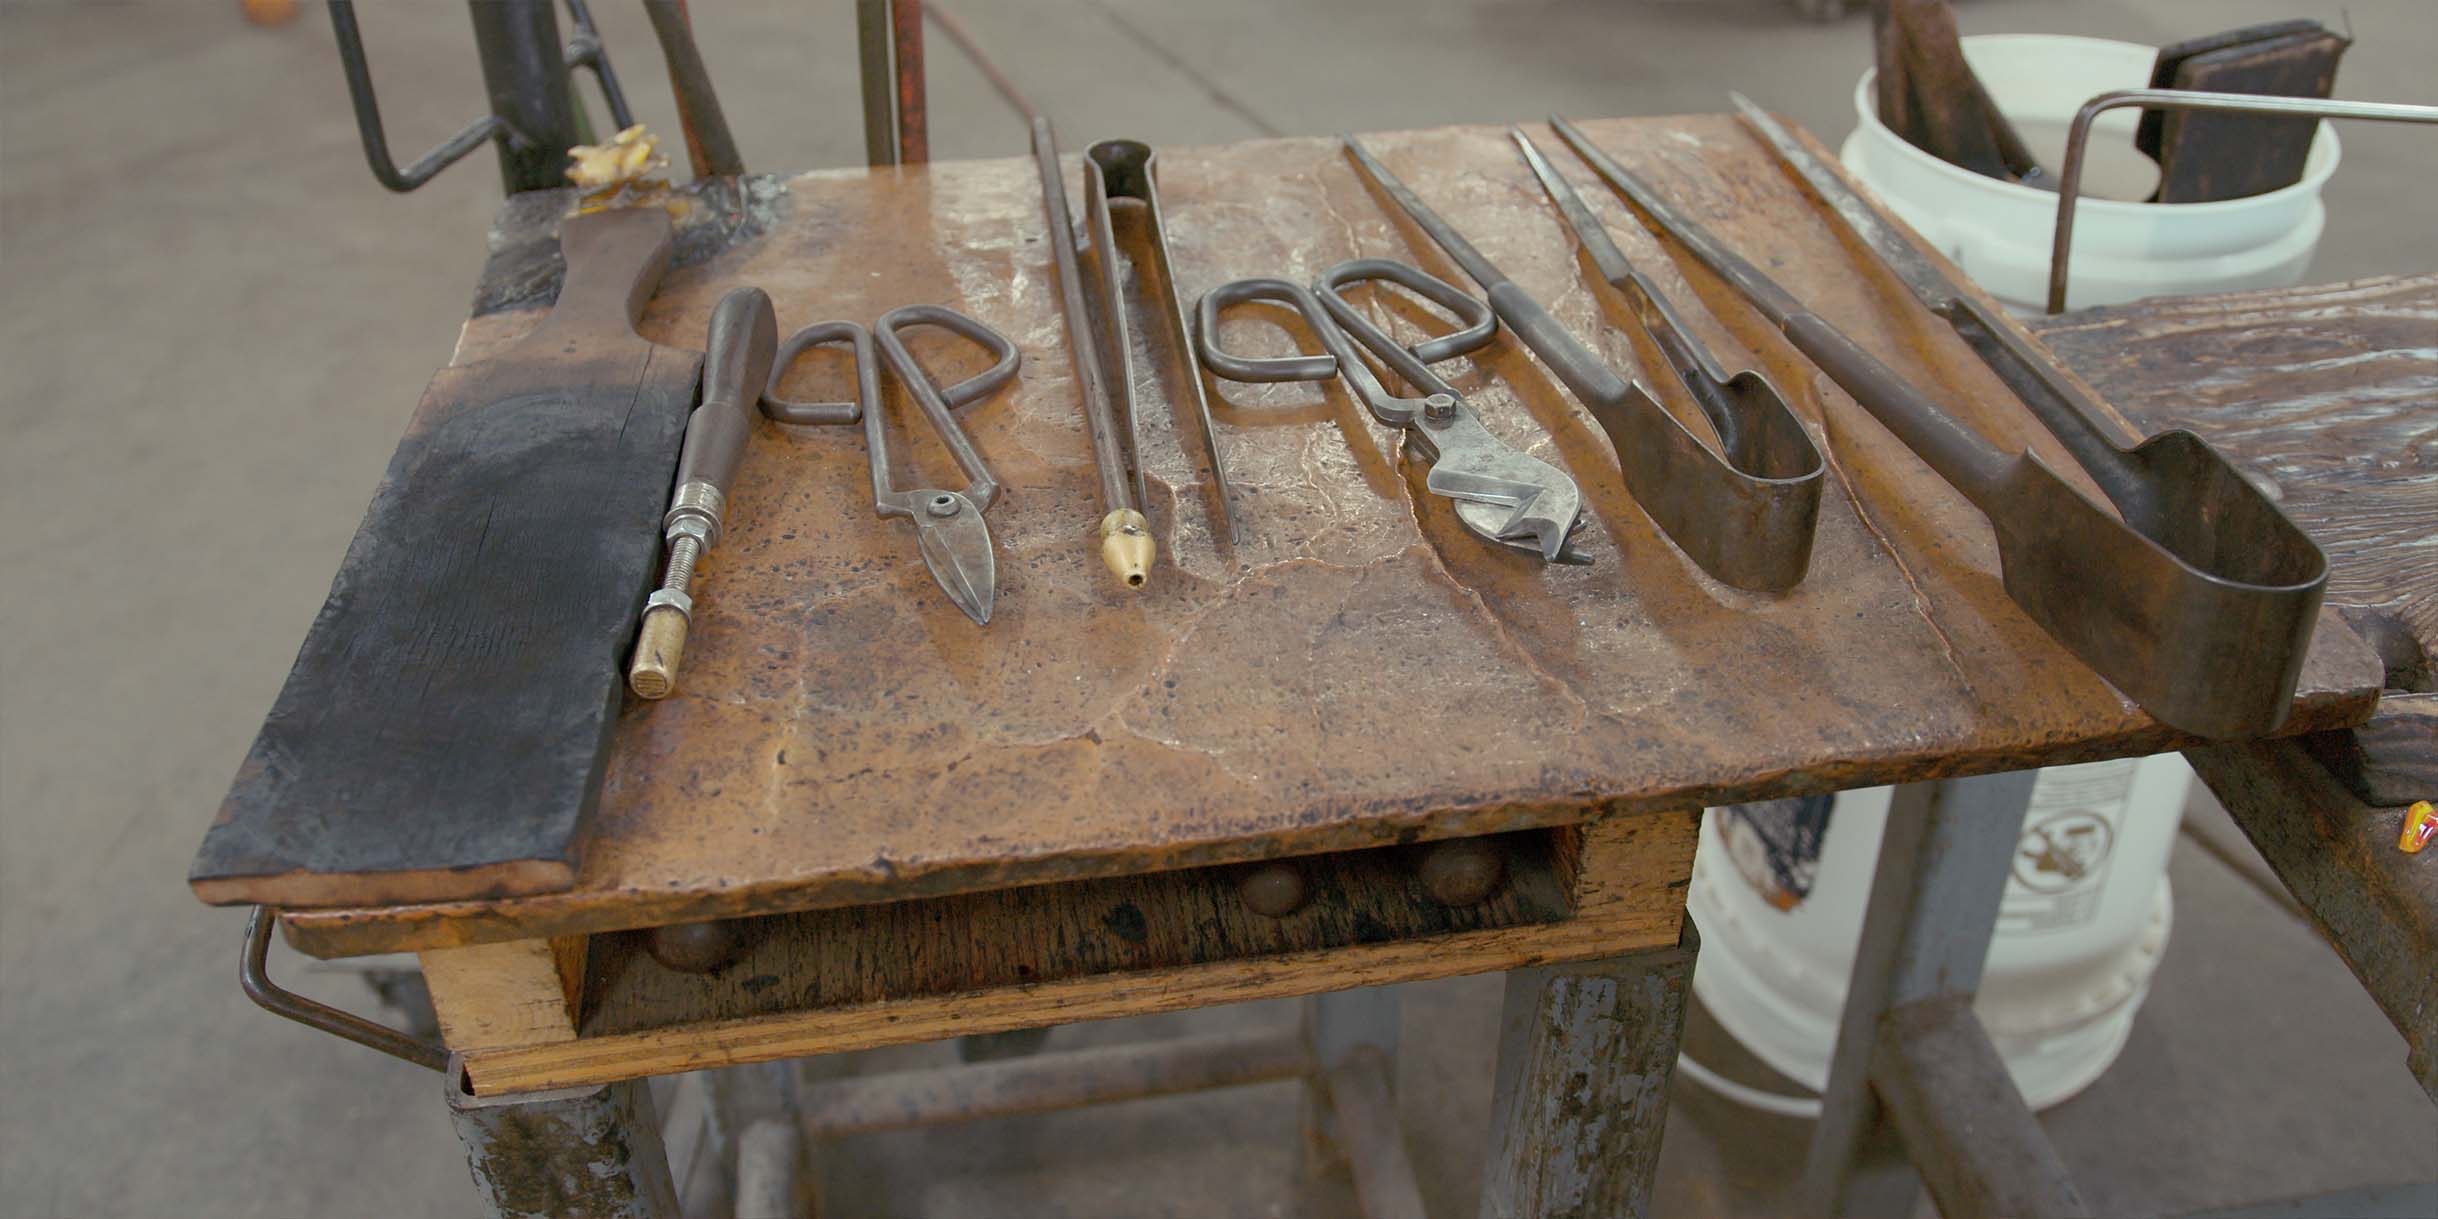
For shaping, we use a variety of hand tools. We’ve got metal tools and some wooden tools called blocks that don't absorb heat that we use for specific shapes. We use a steel table called a marver to roll the glass on. Even gravity is considered a tool. For example, if you hold your pipe down, that stretches the glass out in a way that makes the next step possible. We use the block or the marver to help shape the glass into a rounded shape. At the bench, the assistant will blow down a hollow tube, while the master controls how the piece is blowing out. After you blow the body shape, whether it’s a barrel or cone shape, it’s time to reheat in the glory hole, and then add color.
The Glory Hole
The furnace is where the glass is kept. The glory hole is similar to the furnace, but this piece of equipment serves as a reheating chamber. The glory hole runs a little hotter, so we don't have to stand in front of it as long. You can go back to the glory hole to reheat as many times as you need to throughout the day.
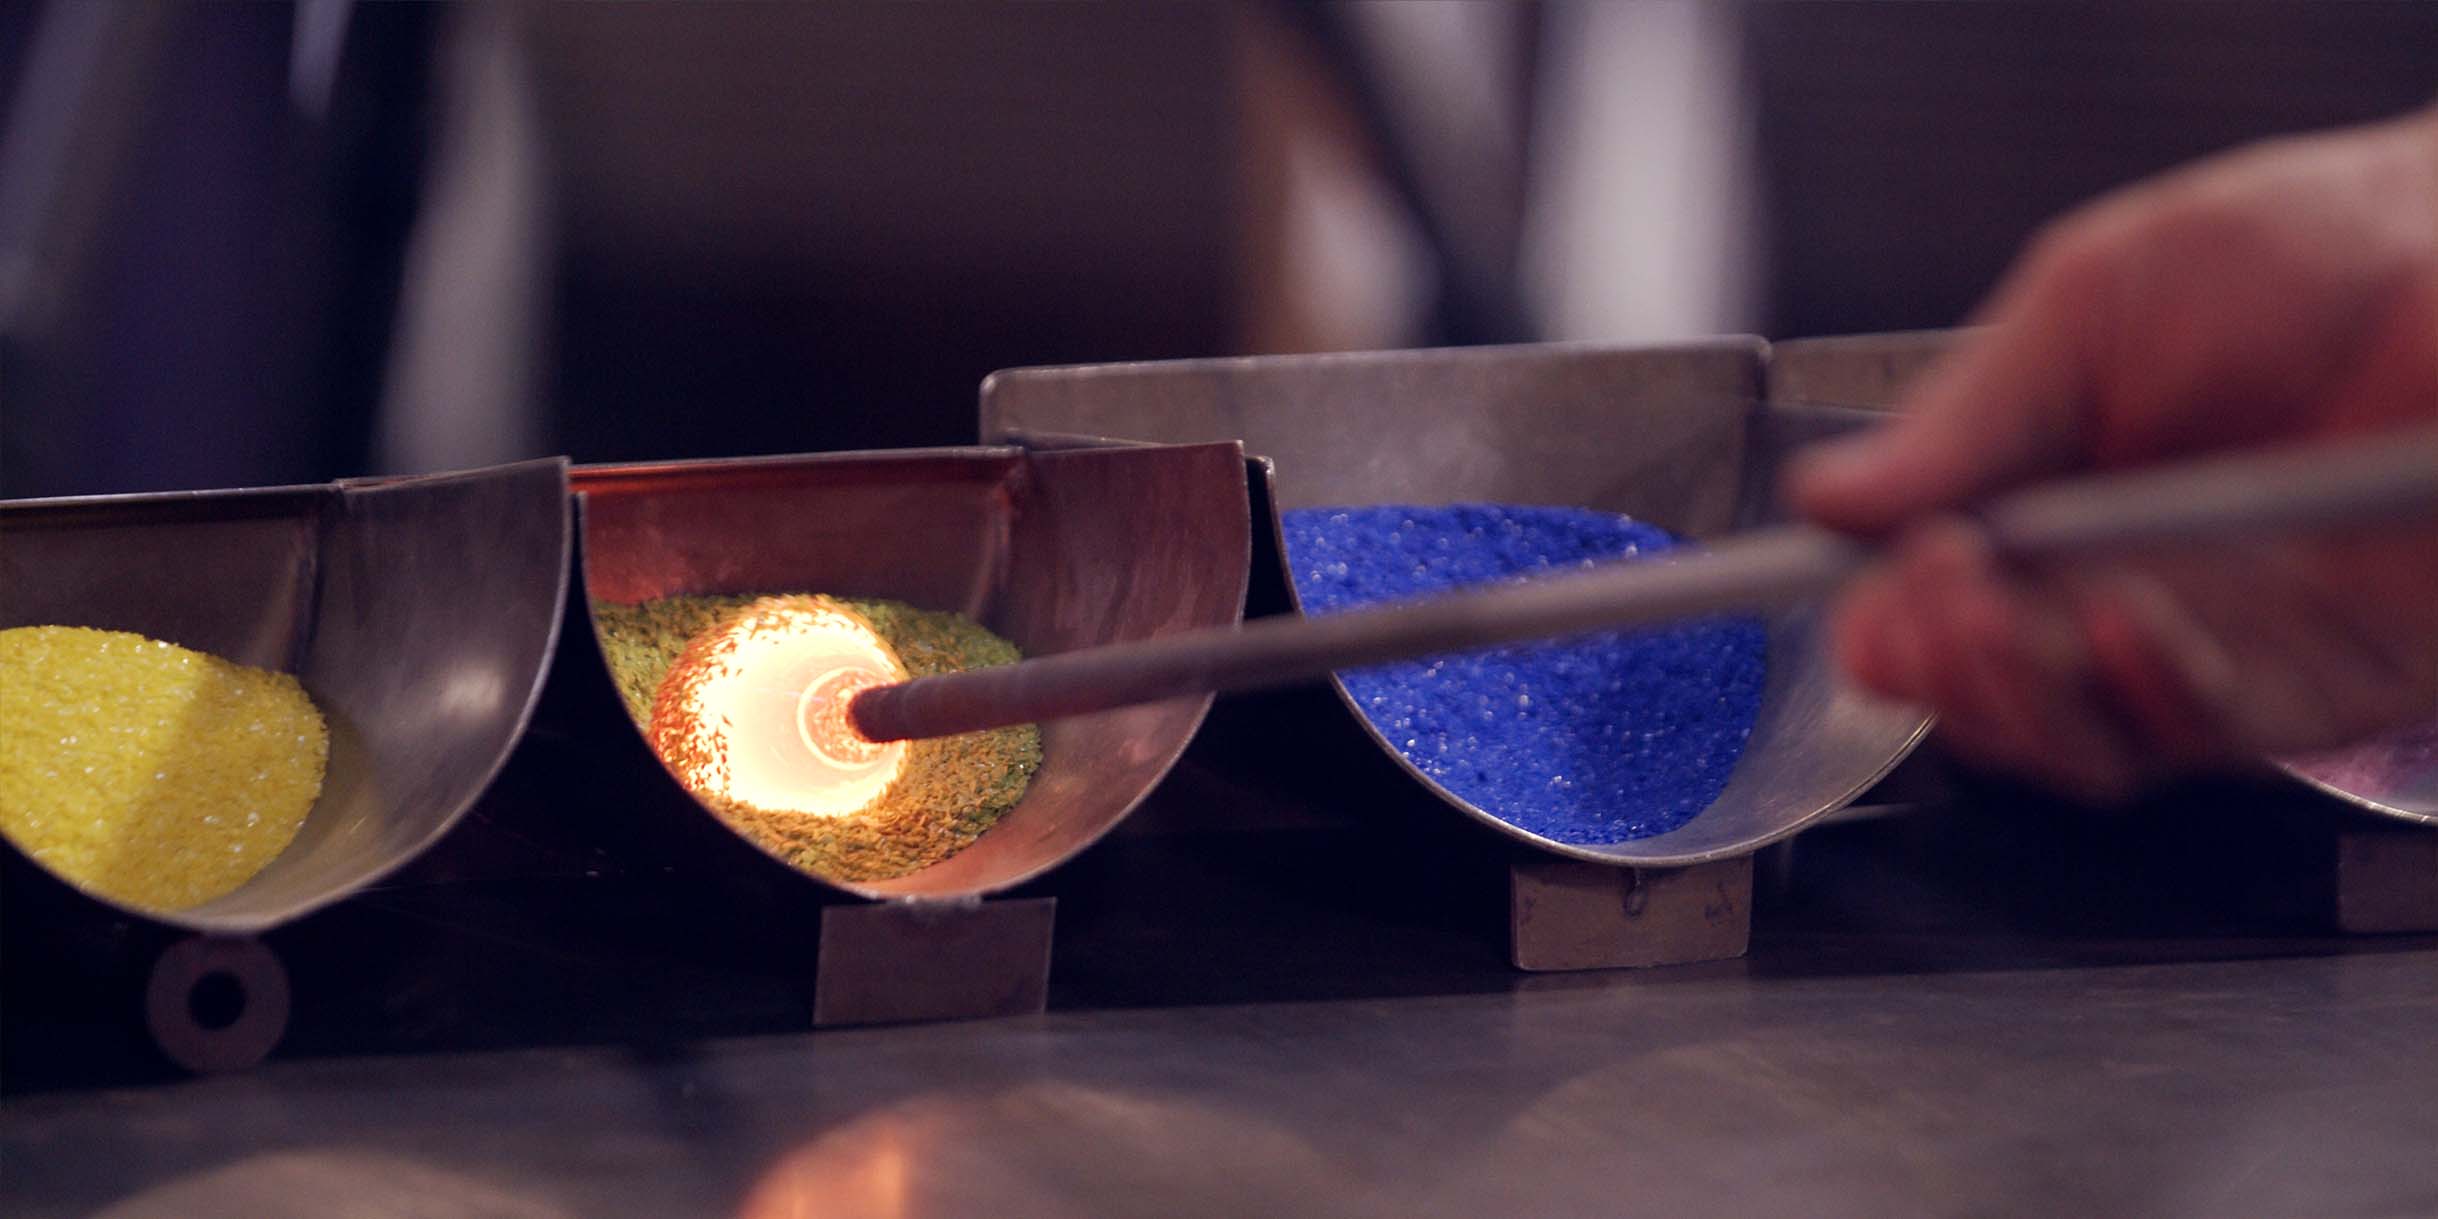
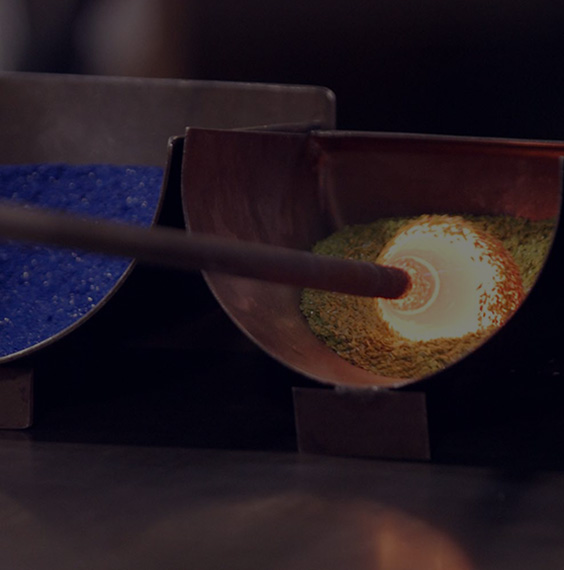
Adding the Color
Colors can be stripes that wrap around, polka dots, little speckles, there are so many options. The colors look like sugar bits that you roll over and they adhere and make spots on your glass. Once you get the color on, you have to melt the color bits and the glass together because the color bits are at room temperature and your glass is at 2,100 degrees. Once you melt them together, you can really start experimenting with how you want to blow it up, and the shape you want to come to the marver with. The next step is adding the foot. We like to add a foot to our mugs to make them more stable.
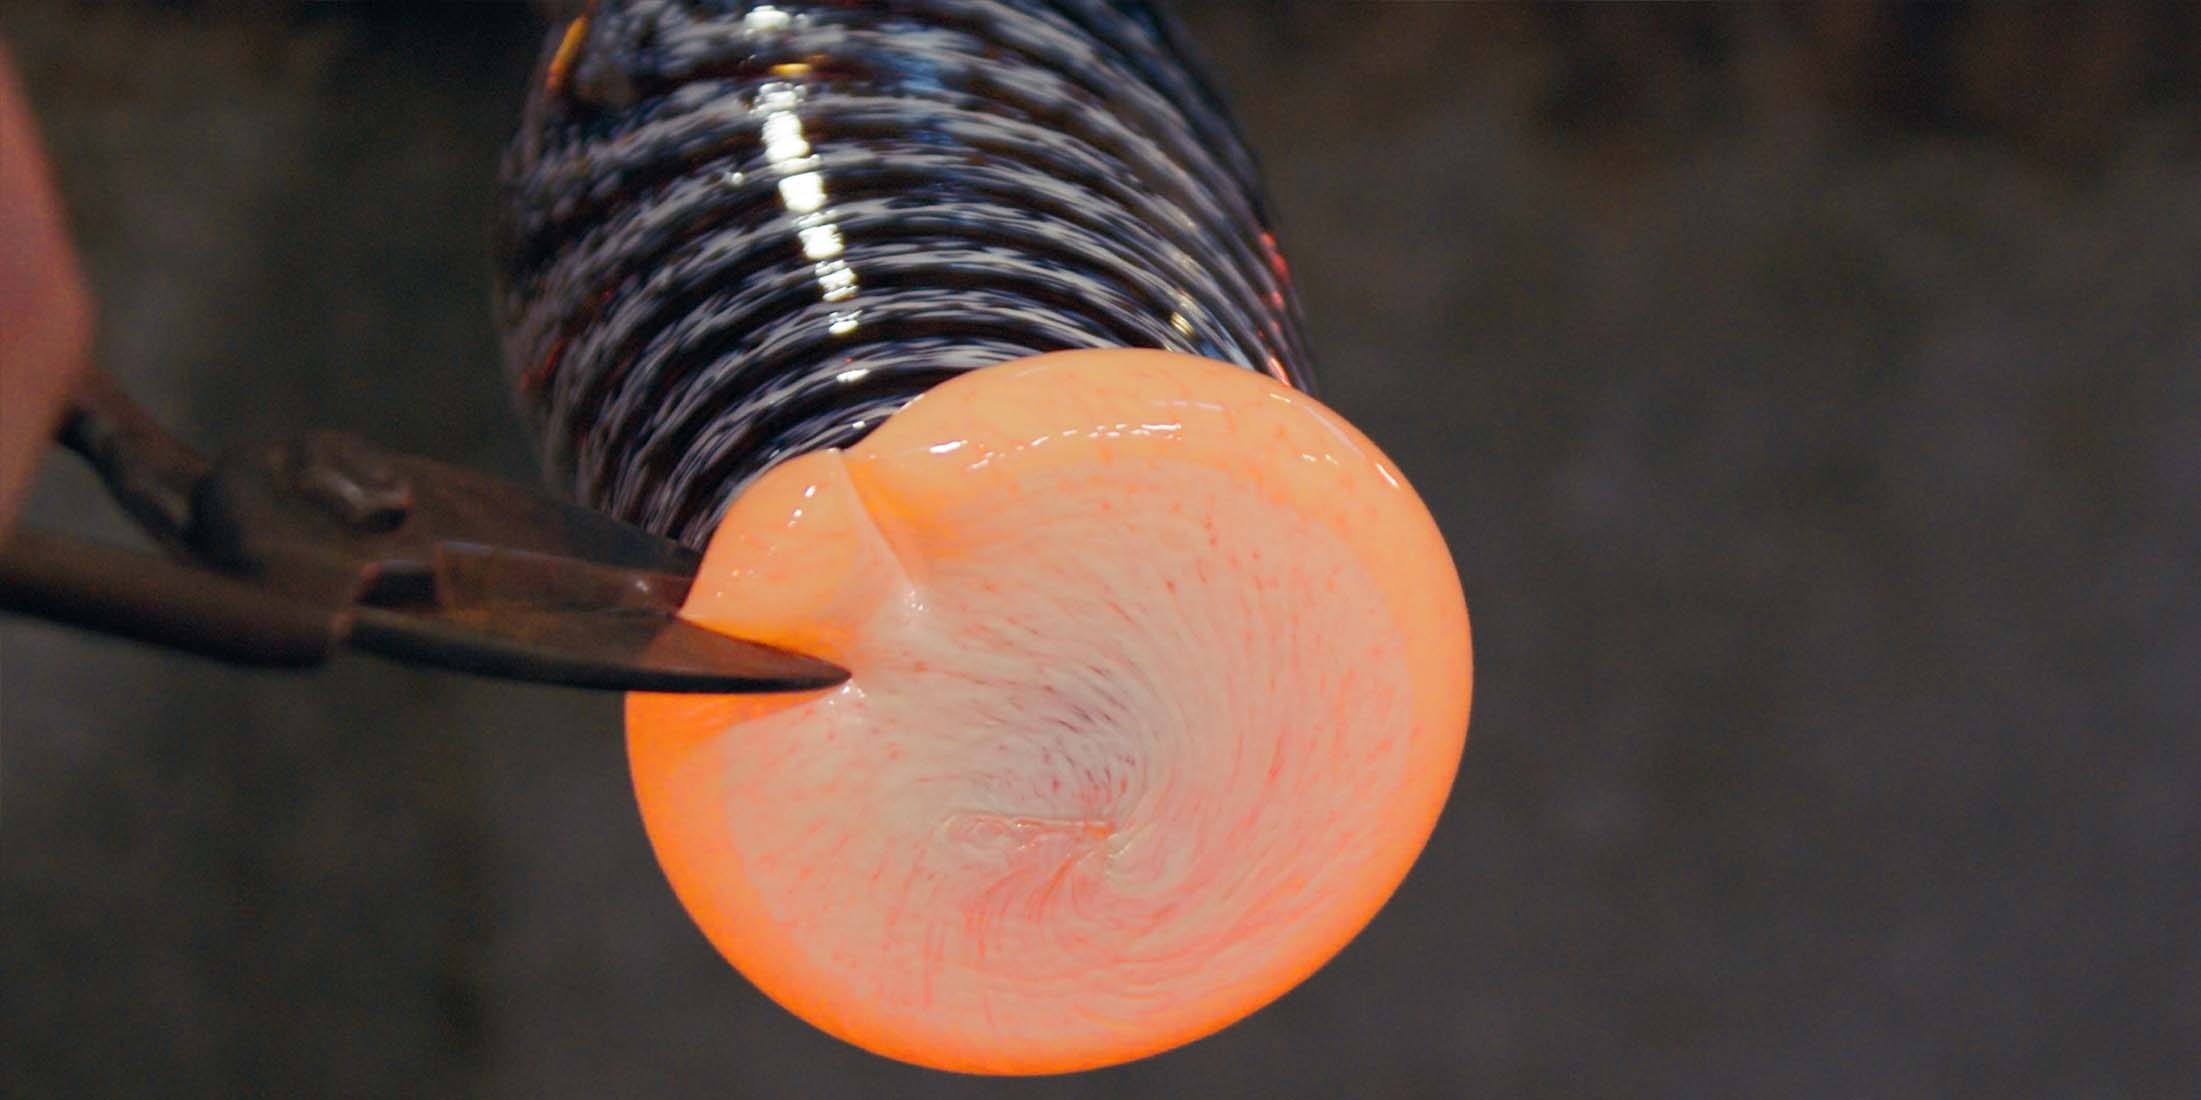
Adding the Foot
If we’re going with a rosetta crimp-style foot, for example, we’ll use a solid punty rod with a glob of glass, add some color on it, and then reheat it in the glory hole. We attach this glob of glass, the foot, to the bottom of the mug. We will then cut it using a pair of diamond shears. The master at the bench will use a wooden tool first to flatten it and then some tweezers to cut the design into the piece. As the design is getting finished, the assistant will straighten the glass up to make sure the foot is completely flat for the table. Then they'll use a wooden board and jacks, or large tongs, to shape the bottom.
Making the Handle
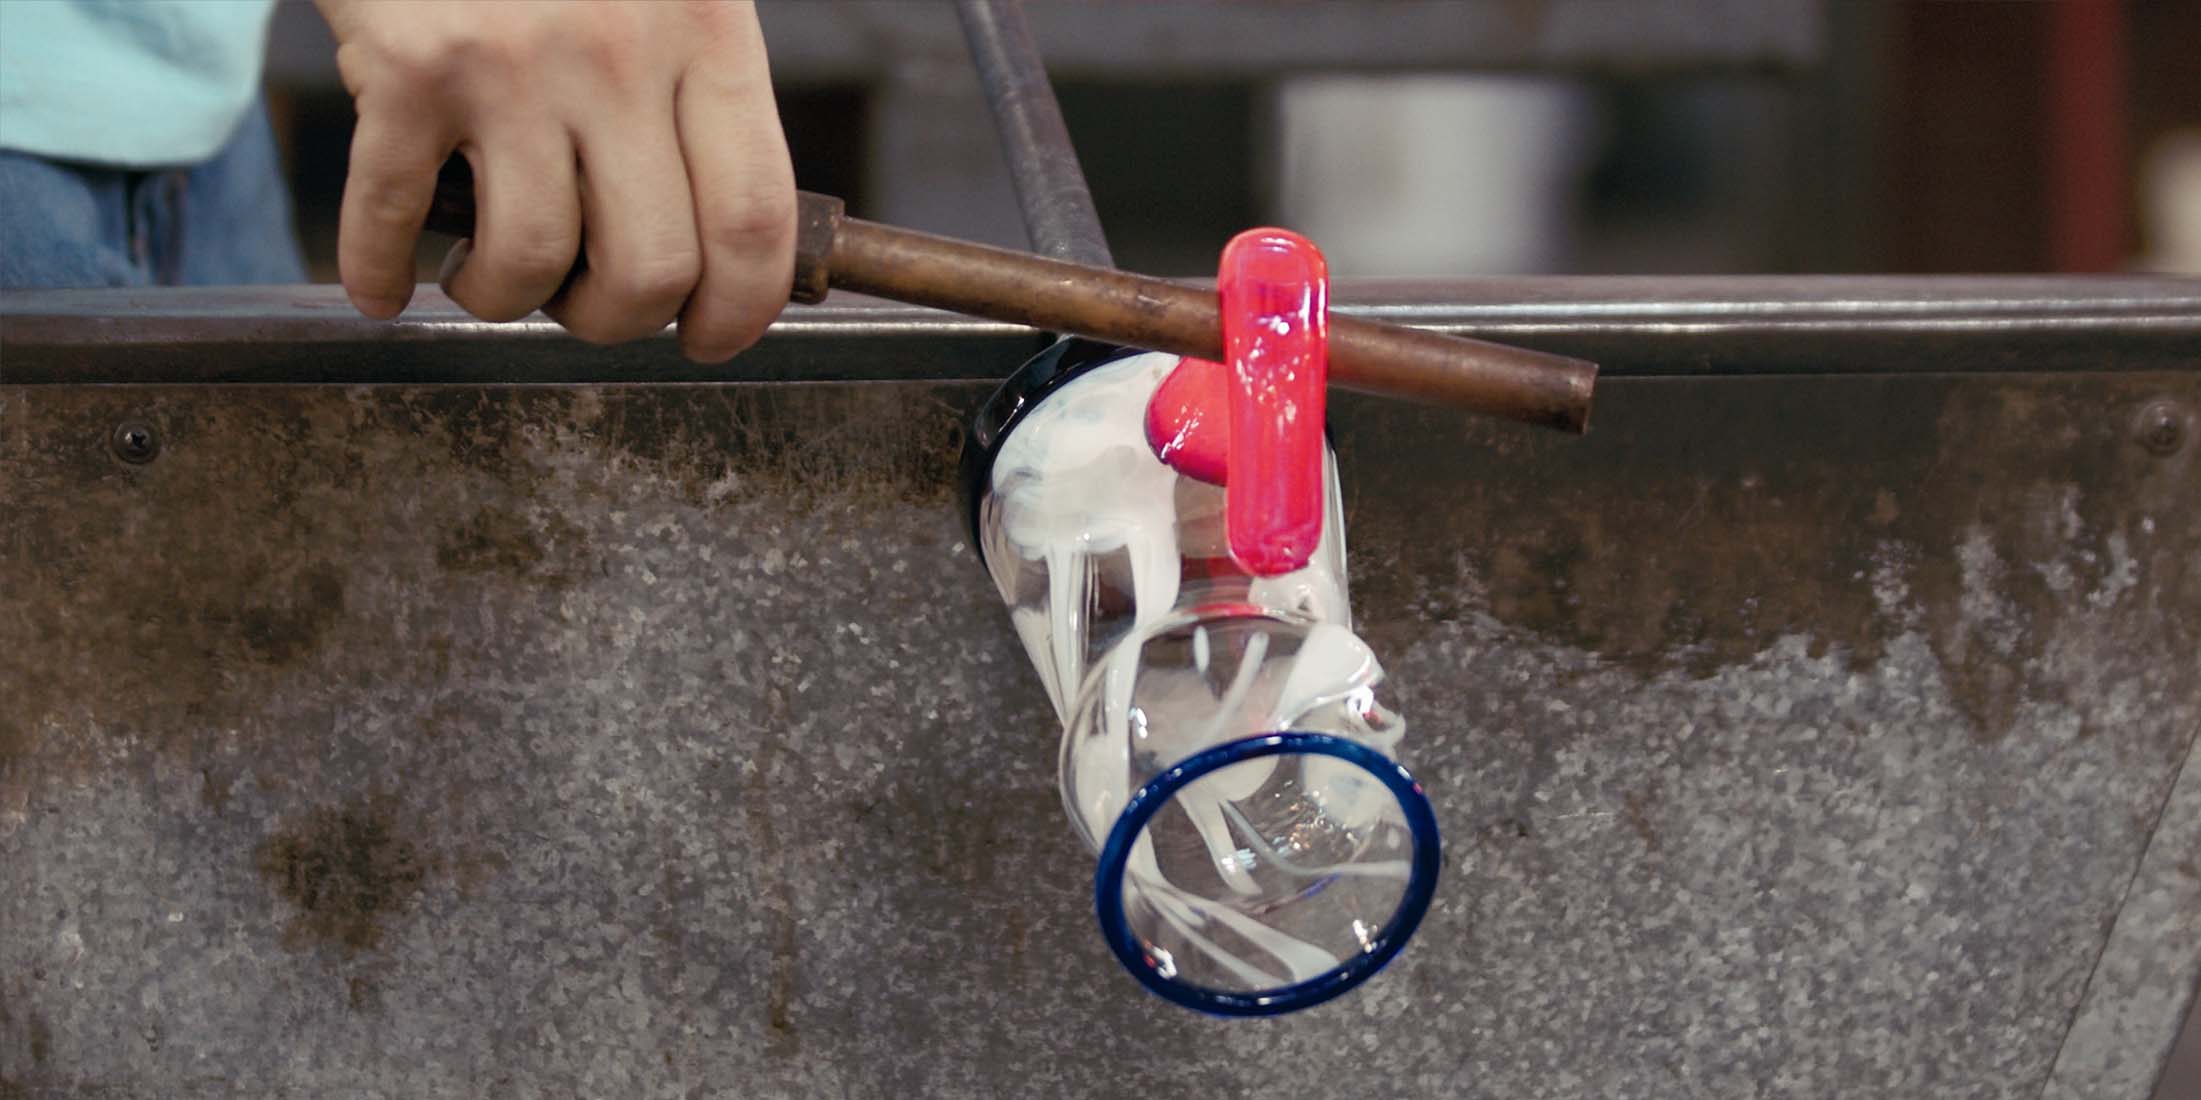
Handles are one of the trickiest things. When you're learning how to do handles, you have to practice one after another for a while until it becomes second nature. We like to do blown handles in our studio because they make the mug a little lighter and they have a really nice feel. Blown handles also allow us to add more decorative elements without making the mug too heavy. A blown handle is achieved with a small blow pipe with a bit of glass added, dipped in color or clear, depending on choice. Then you roll it and shape it and bring it over to the glassblower at the right temperature. You literally have five seconds to make it work because it's going to cool down so fast and it won’t want to restick at the top. If the temperature’s right, you flop the handle over and make sure it's straight using the copper pipe.
The Signature
The final step for our mugs is our signature. It starts with a small piece of glass attached to the body of the item, similar to a wax seal, and then we stamp our logo into it. So when you're drinking from your mug, you have that little seal that tells you it's a Glass Academy mug and it came from our studio.

When you get done with your piece, you want to use it, you want to see it, and it's really engaging. But you have to put it away in the annealing oven because it's still hot — maybe 800, 900, or 1,000 degrees. The glass needs to be a certain temperature before it goes into the annealer. If it's too hot, it will slump and be all crooked. So you put it in around 900 degrees and overnight its temperature comes down slowly. When we get here in the morning, it's about 100 degrees. We crack the doors open, let that last residual heat escape, and then we can open the doors all the way and view the items that were made the day before.
 |
|---|
Glassblowing Tools of the TradeGlassblowing has a language all its own. What do these terms mean? Annealer – A large, brick-lined cabinet used to slowly cool down the finished piece over a 24-hour period Bench – Where the artisan sits to turn, shape and mold glass Block – Wooden spoon-like vessel with a handle, soaked in water used to shape glass Blow Pipe – Hollow, stainless steel tube used to get glass out of the furnace and shape the glass Crimps – Used to design and shape the glass Furnace/Glory Hole – 2000-degree heating and reheating chamber Jacks – Large tongs used to score, flatten and shape glass Marver – Steel surface to cool and shape the molten glass Molds – Forms made of wood or different metals to give glass a specific shape and texture. Paddle – A wood or graphite tool used to form glass Punty – Solid rod used to scoop glass onto for bits and pieces added to the main item. Pyrometer – High heat thermometer used to gauge temperatures inside the glory hole, furnace or annealer Tweezers – Used to design and shape the glass Yoke – Metal stand on wheels in front of the glory hole used to help support and stabilize the blow pipe |
The information contained in this article is intended for general information purposes only and is based on information available as of the initial date of publication. No representation is made that the information or references are complete or remain current. This article is not a substitute for review of current applicable government regulations, industry standards, or other standards specific to your business and/or activities and should not be construed as legal advice or opinion. Readers with specific questions should refer to the applicable standards or consult with an attorney.


CONNECT WITH US


SIGN UP FOR EMAIL
Get more great content in your inbox.